Halloween Coffin Diorama Project
A fun-to-make fall project for ages 8 thru adult. You can make it as whimsical or as spooky as you like! Kits made by Yucandu and available while supplies last.
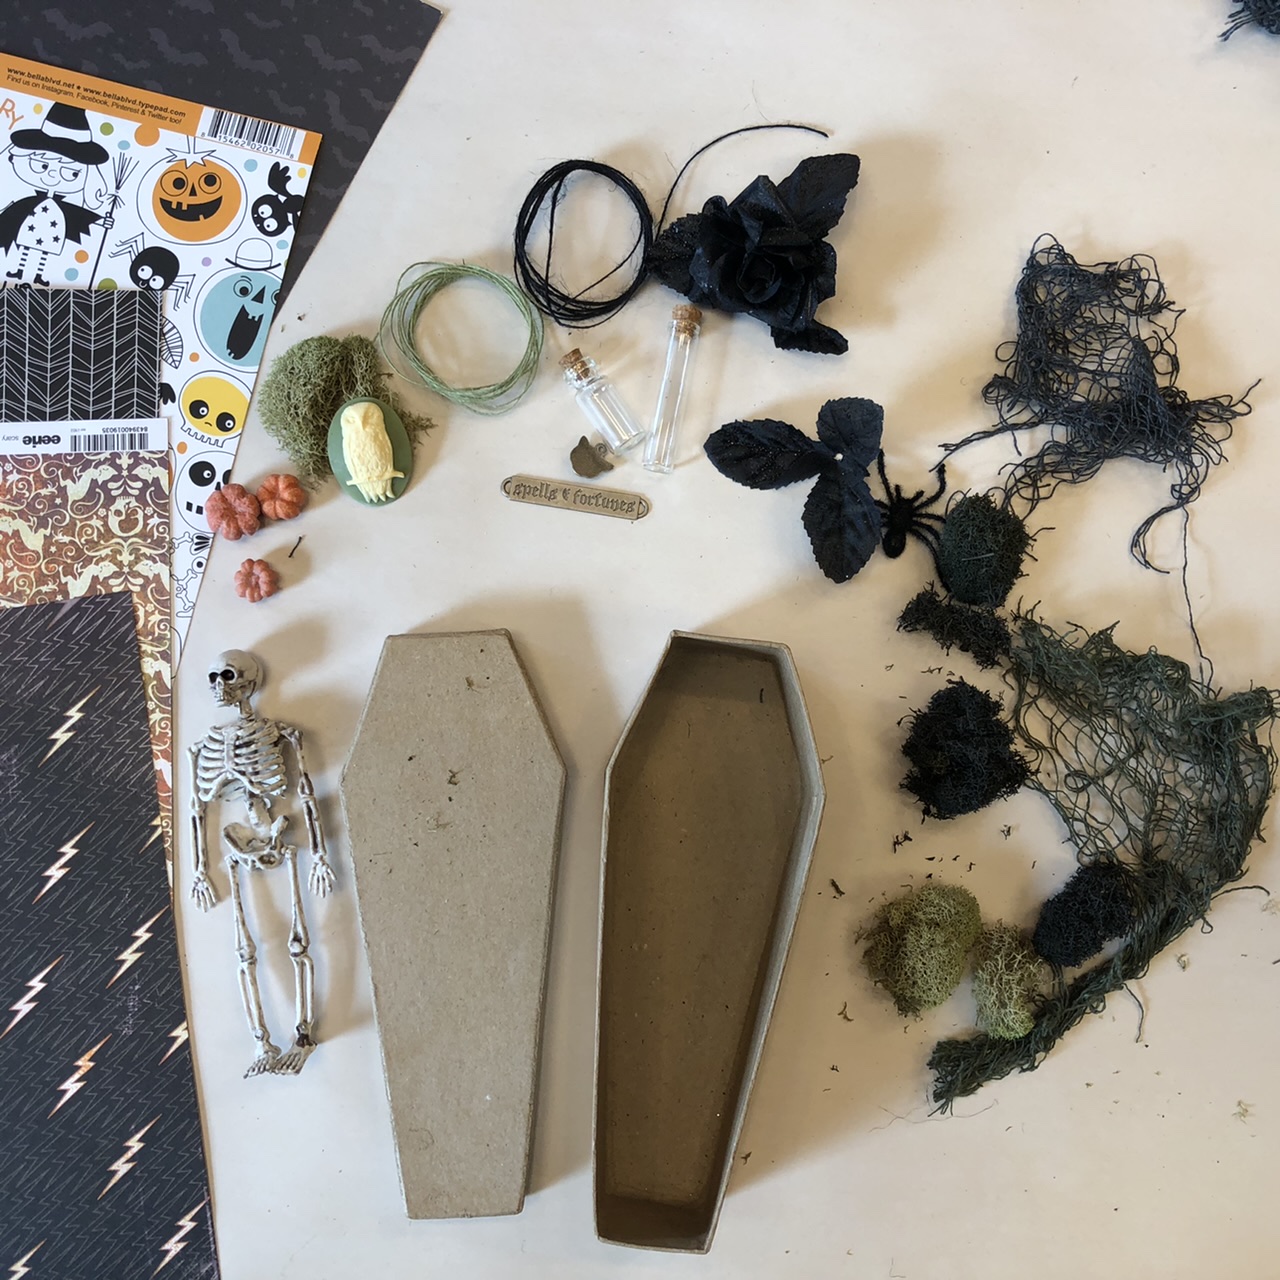
Supplies included:
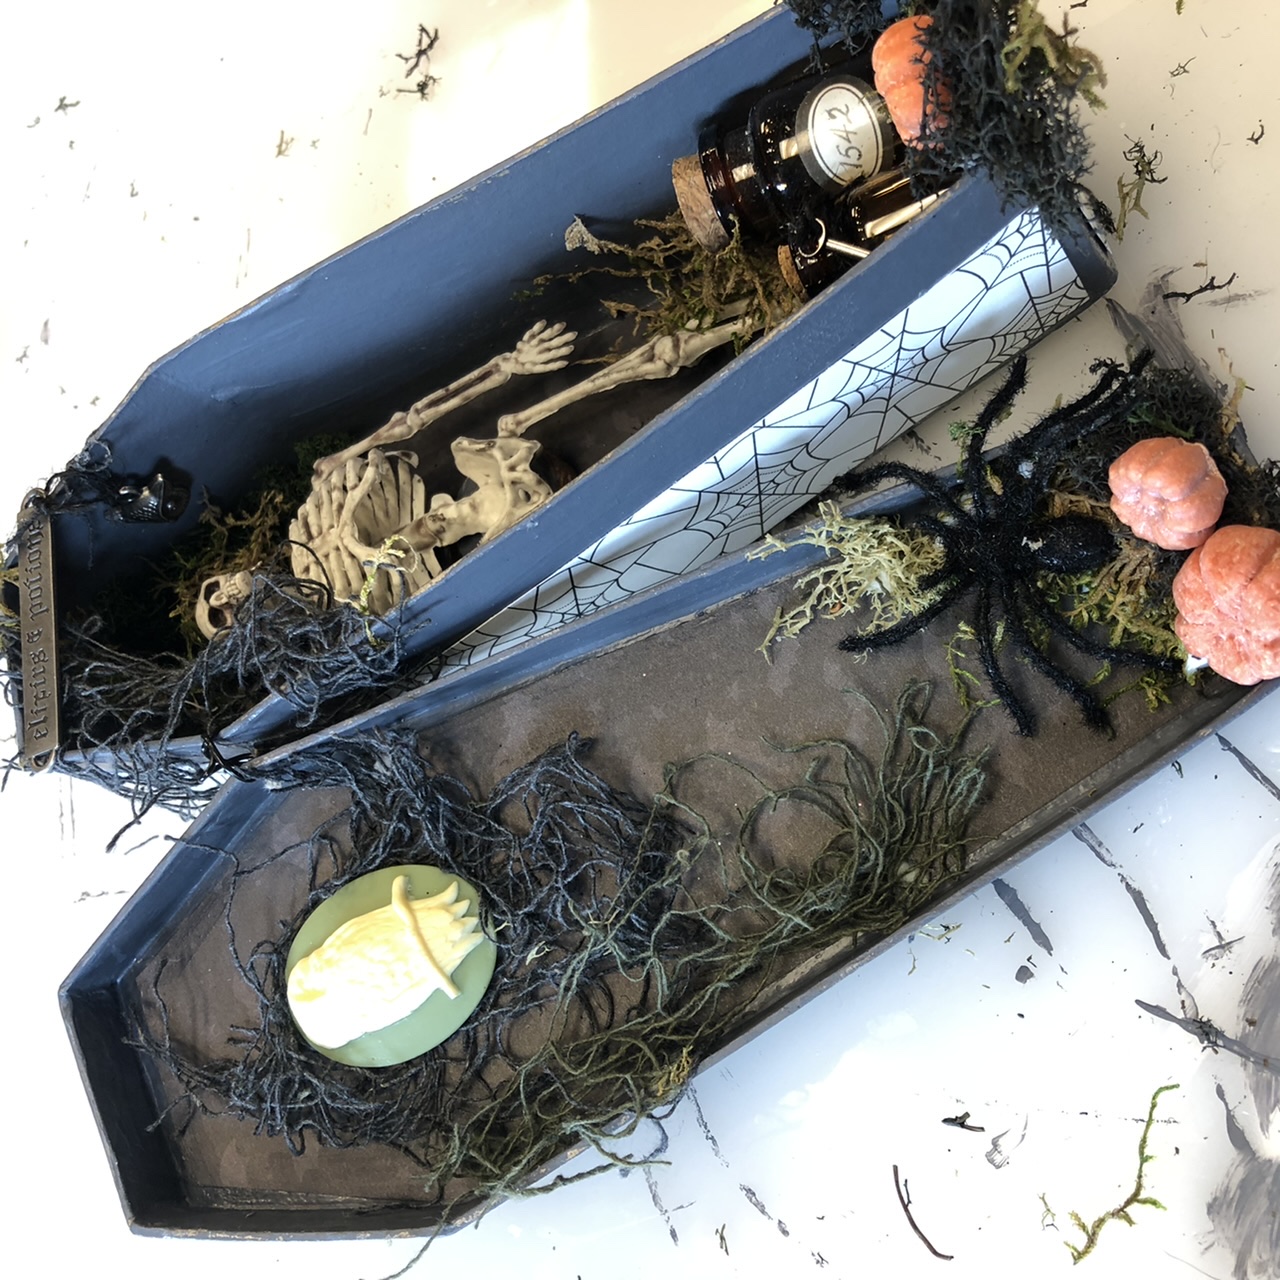
Paper Mache Coffin, 2 6×12” two-sided papers (bright & fun or dark & spooky), Matt Mod Podge, dark gray paint, Ultimate glue pot, skeleton(not shown here—oops), three miniature pumpkins, fuzzy spider, 2 bottles and labels, two wood discs, string, wire, pewter word band, owl charm, key charm, owl cameo, assorted moss and netting. Some slight variations may apply.
You will need scissors, ½”-3/4’ flat paint brush, wet wipes, paper plate, pen or pencil.
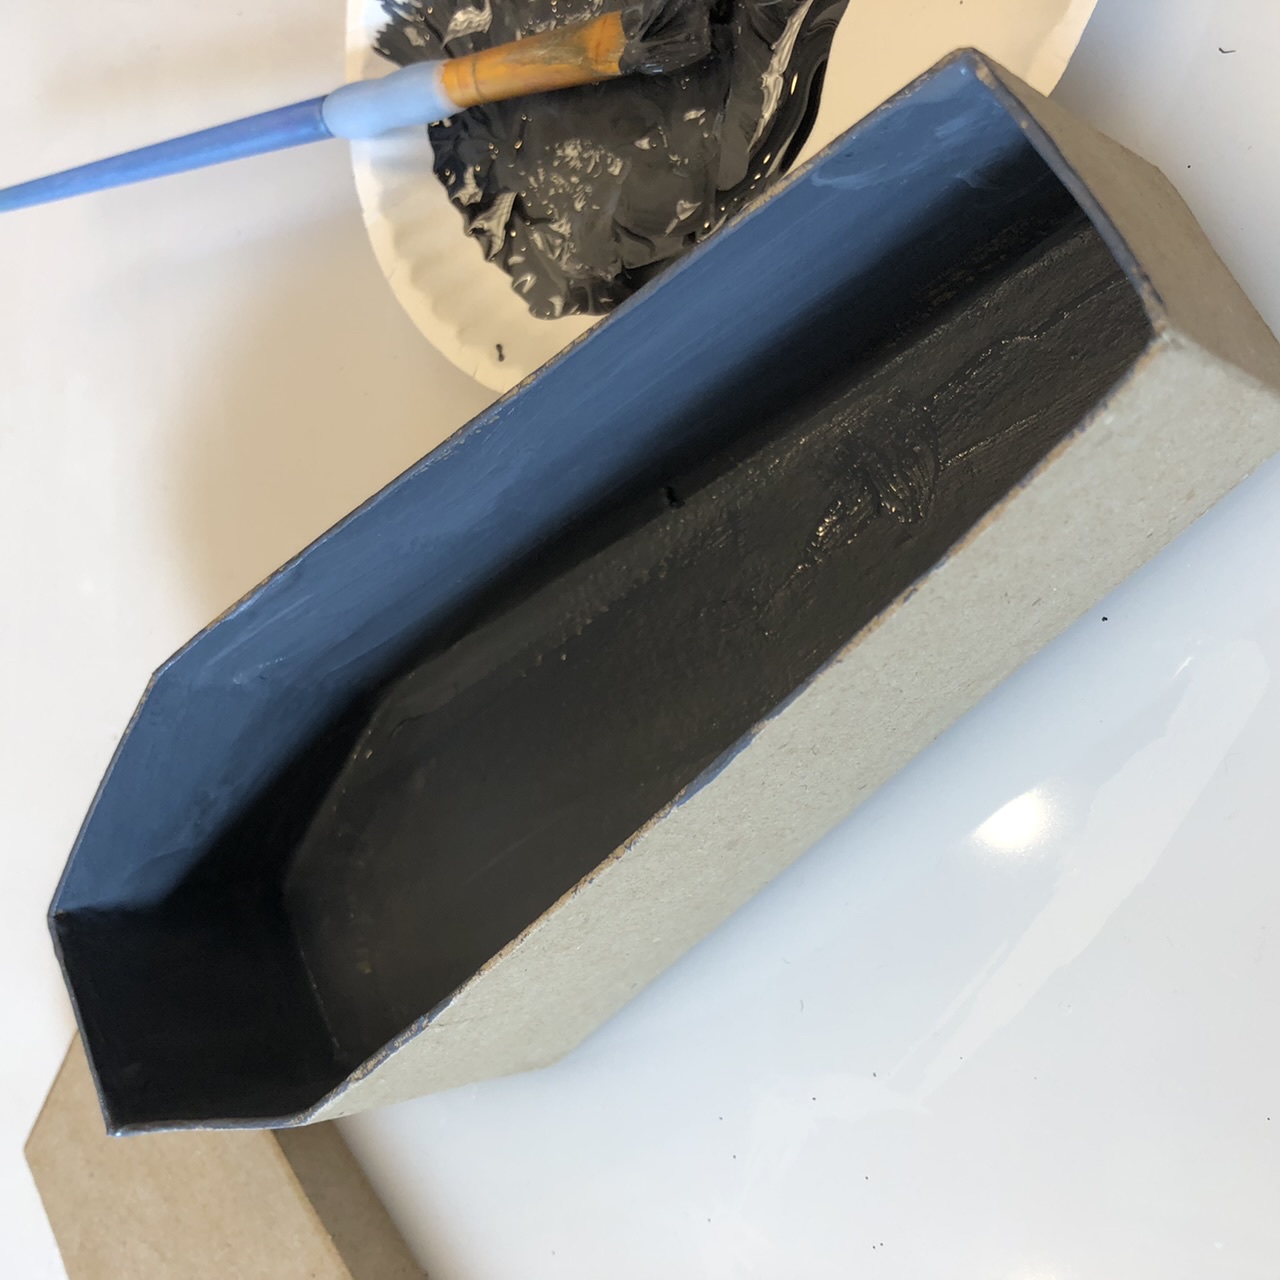
Set up your work space with plastic, rather than paper. Painted projects tend to stick to paper. Set all goodies and papers aside so they don’t accidentally get paint on them.
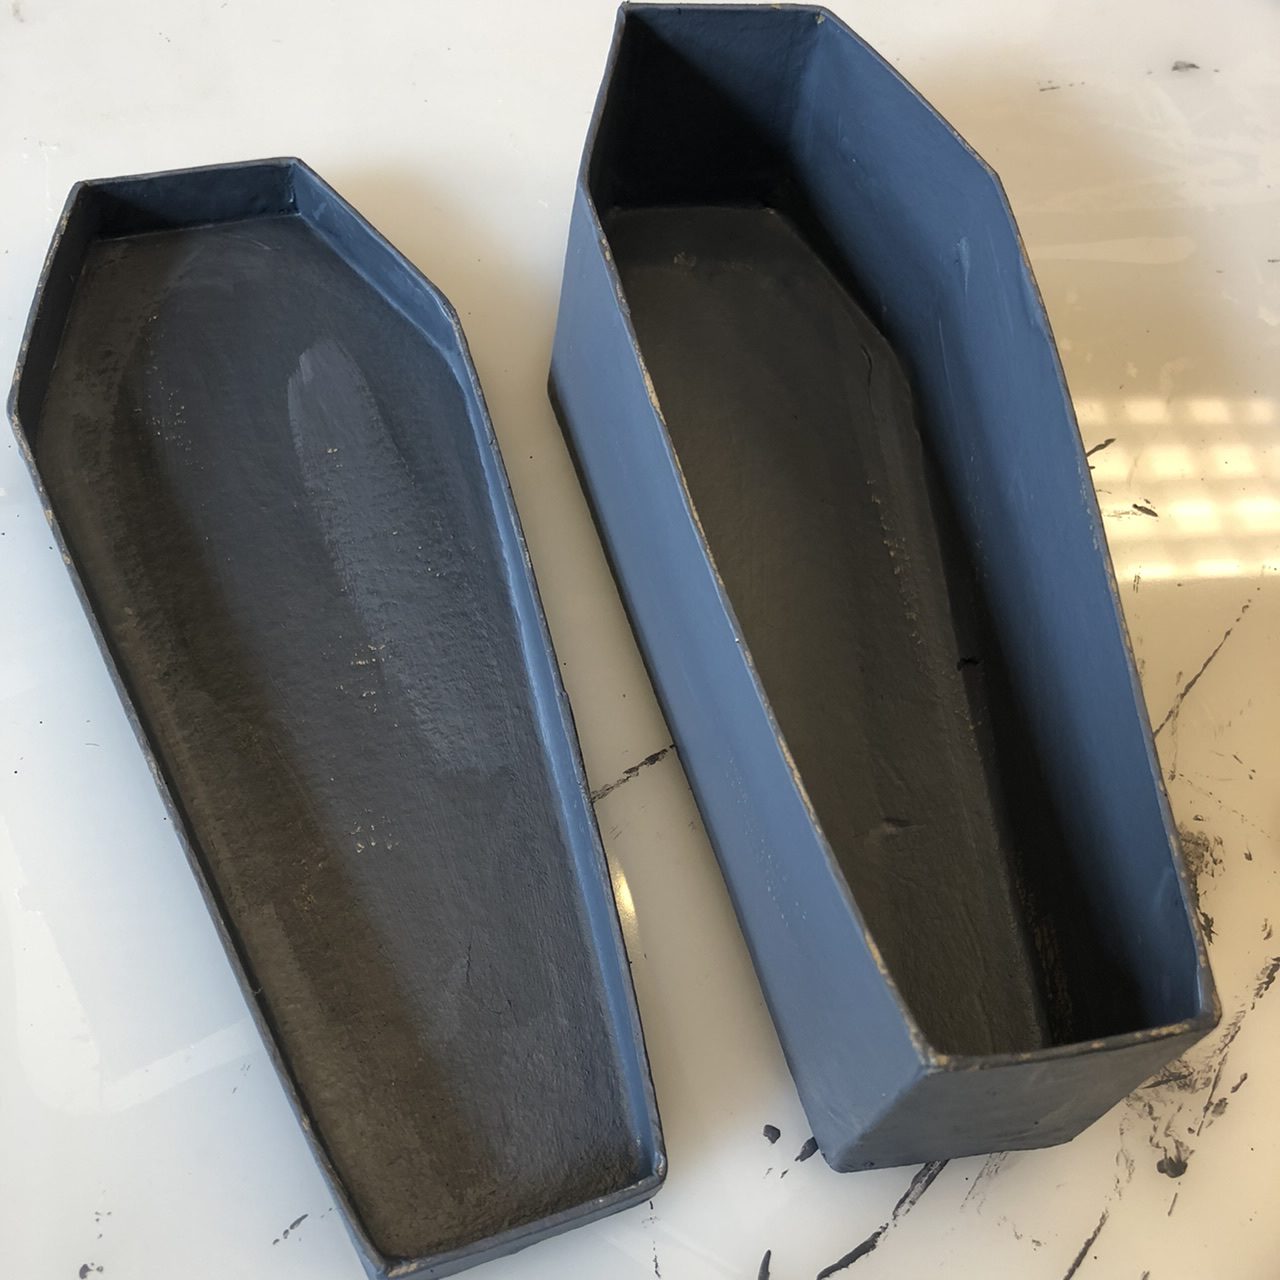
Paint the inside of coffin first. This way you have a dry place to hold it while you are painting the inside. (A paper plate makes a good paint palette.) Then, finish the outside and backside too (This is a 3-dimensional project, so all sides will be seen.) No need to be super perfect because a little distressed look just makes it look even better. Set aside painted lid and base to dry.
Choose which paper you want to see on the inside of coffin base and lid. Once your painted pieces are thoroughly dry, trace with a pen onto the paper, around the outside of both coffin pieces. Be sure to lay out your cuts before tracing or cutting, making the best use of the papers. I like to “shadow cut” my paper, which means cutting about 1/8 to 1/4” inside my pen line. Try 1/8” inside first, because you can always cut more as needed. Shadow-cutting simply gives you wiggle room to not have to be perfect. It also leaves a little painted border around your papers, which makes them POP!
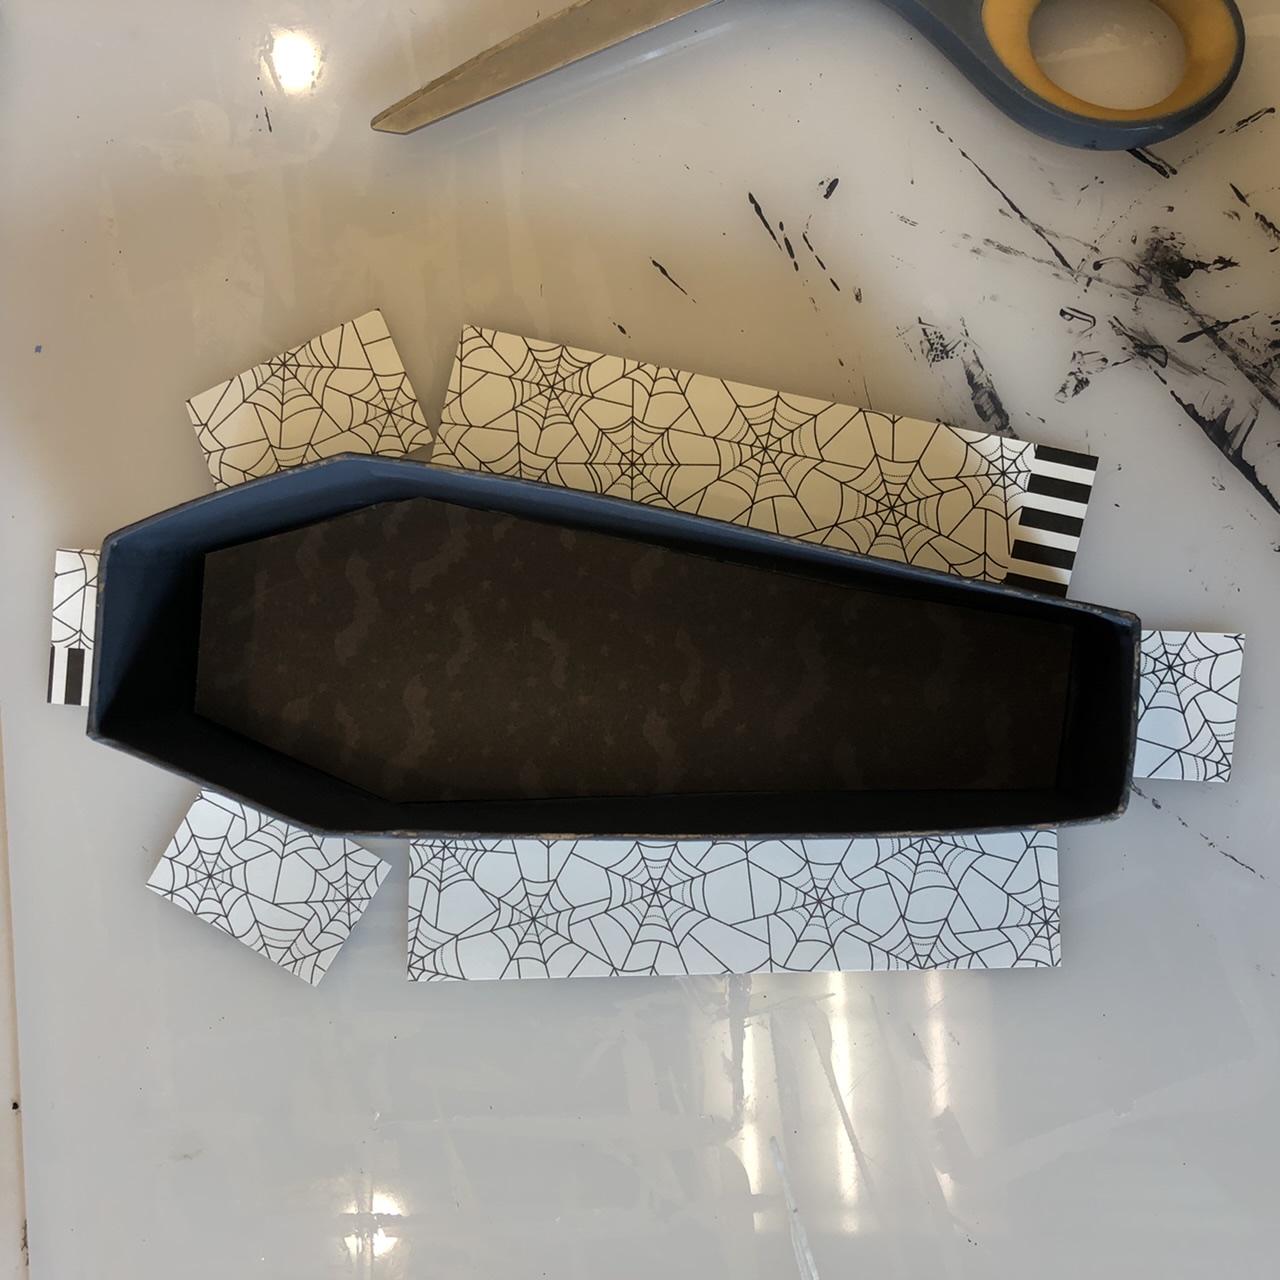
Tip: For the paper for the outside coffin edges, I cut mine so I could have the option of fitting the lid back on. The extra paper and glue under where the lid snugly fits would make it too tight to close. Whichever you choose, to leave open or have option to close the lid, cut your paper accordingly. Before gluing, check that all paper pieces fit easily, without buckling or hanging over. Now, lay out all your papers just to double check that you have them all ready to go.
To glue paper on, you will need the MMP (Matt Mod Podge) and a flat paint brush. It’s a matt finish, but it has a low luster. Because you can see the low luster of the glue a after it’s dry, I brush it over the entire surface, even where the paper will not be. Start with the cut paper piece that will go inside the coffin box. (I chose the dark bat paper for the inside so that my skeleton would POP.) Spread an even, thin layer of MMP on the inside bottom of the coffin box. Place your cut paper onto the glue and smooth down so the edges are firmly attached. (An old credit card is a helpful tool to smooth paper.) Gently, remove any excess glue with a wet wipe. Do not add glue on top of the paper. Repeat steps for the outside papers. See how the shadow-cut leaves a little painted border around each piece of paper?


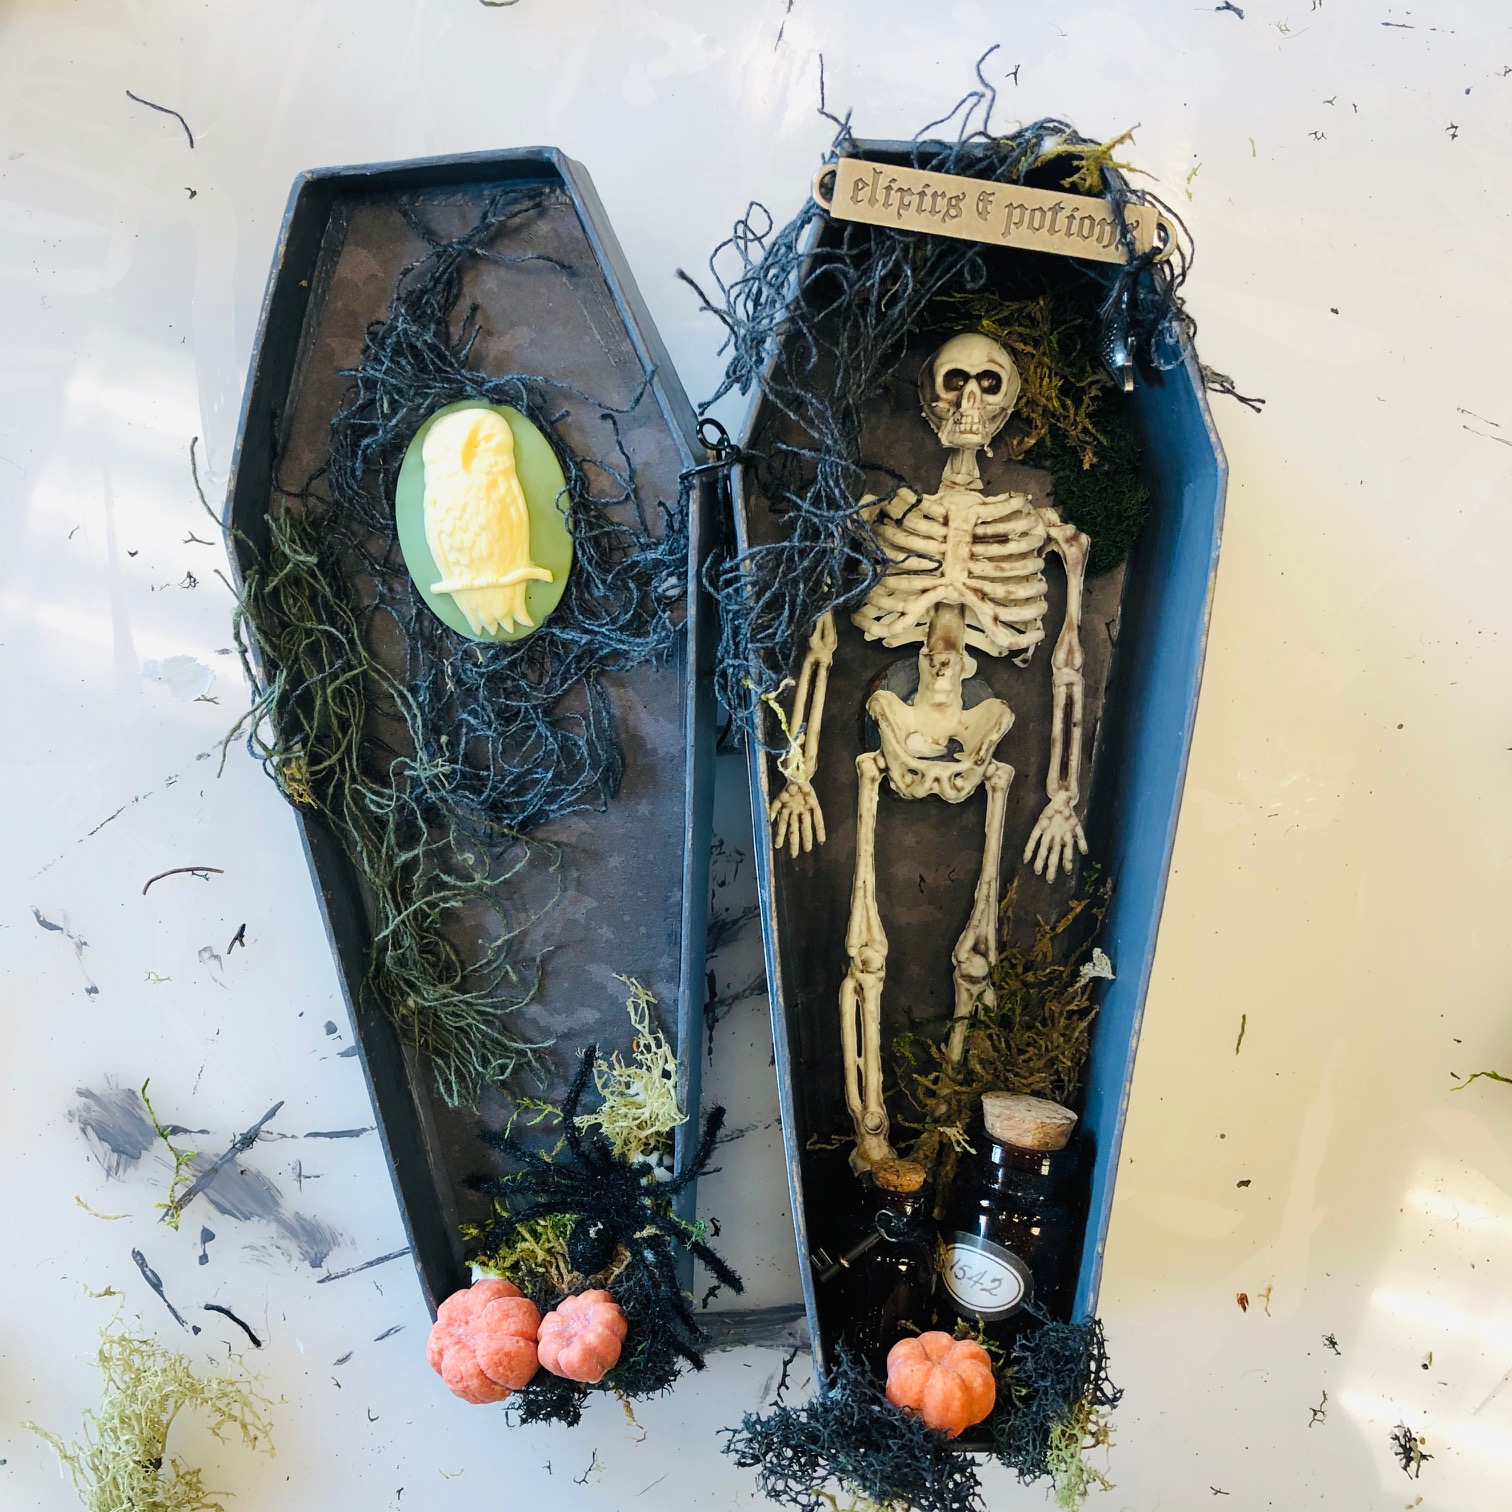
Allow glue on paper to dry thoroughly. Then arrange your fun diorama pieces, trying different ways until you’re satisfied.
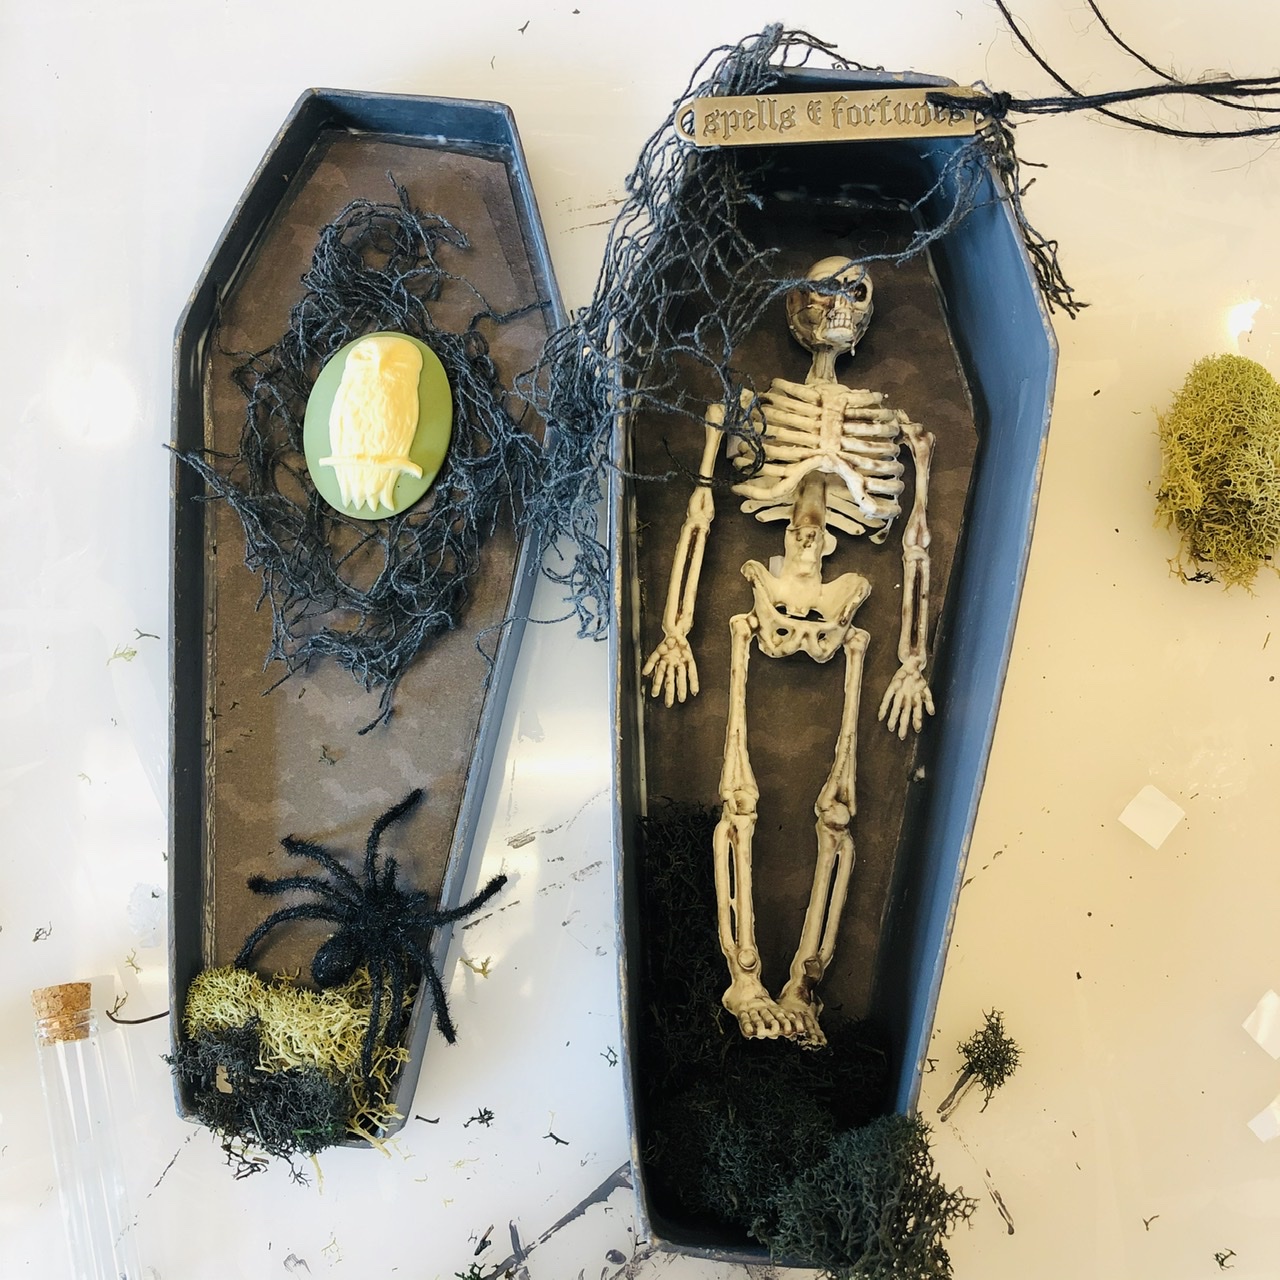
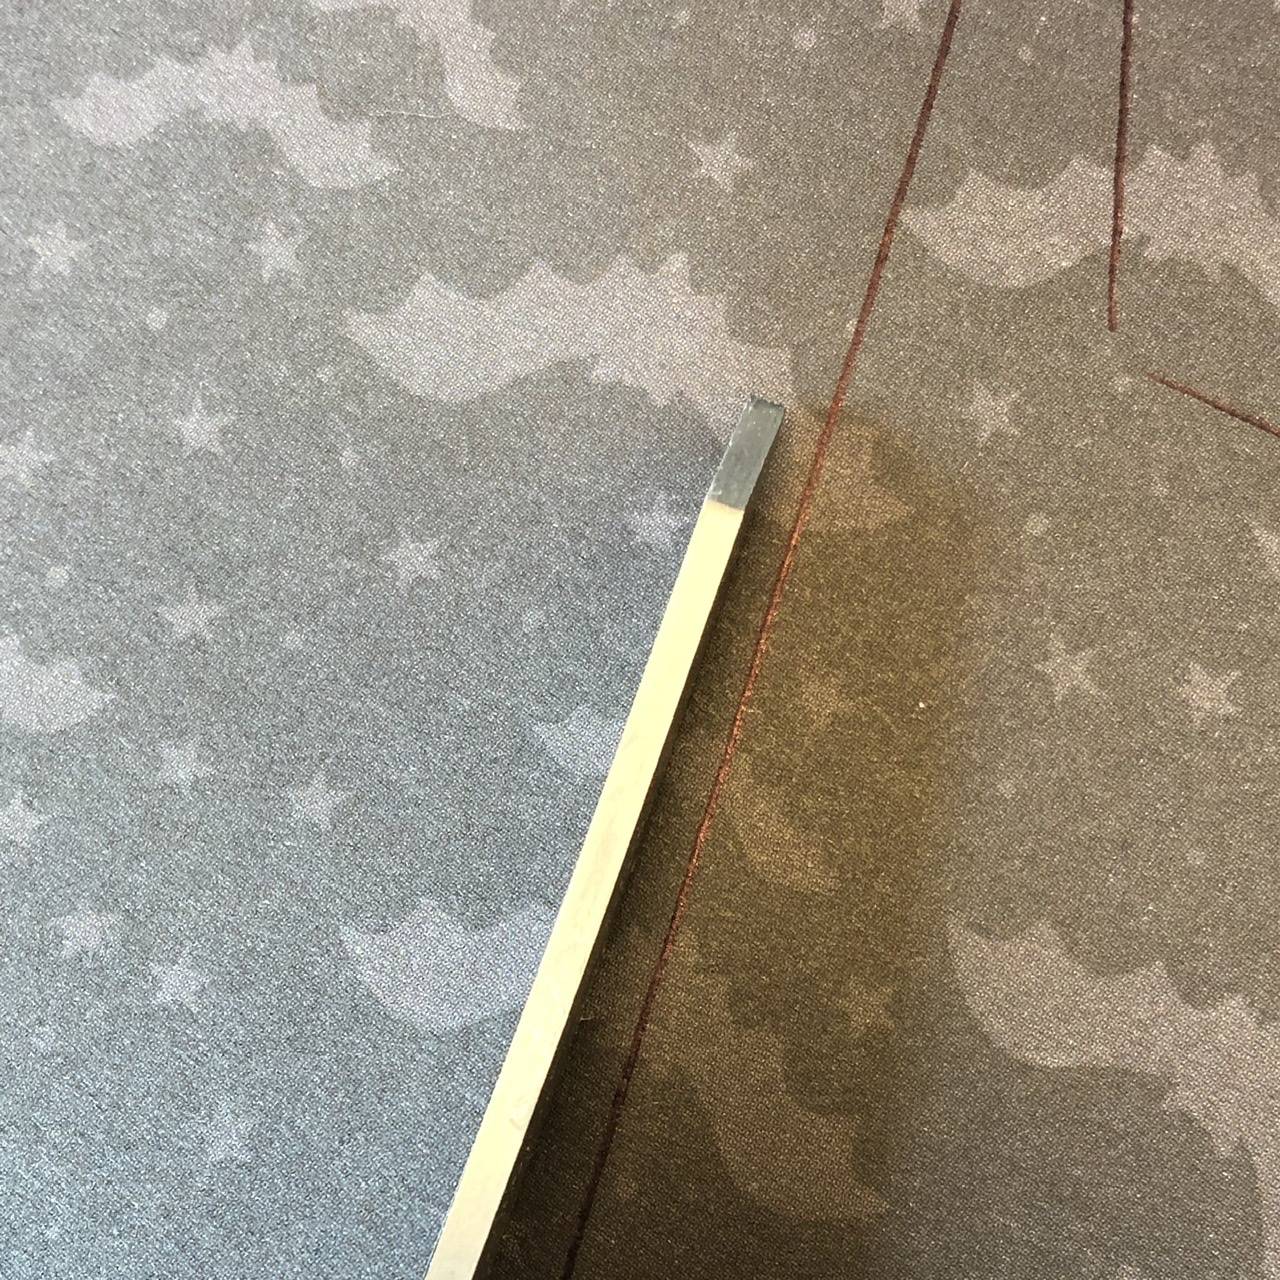
Tip: I used the two small wood discs to raise the skeleton up—it creates a floating effect. I painted the side of the disc that would show thru the skeleton. Since my paper was dark gray, the gray paint made them virtually disappear! I glued the discs, painted side toward the skeleton,with the Ultimate glue (ULT) using the matchstick to add just a dollop in the center of the discs.

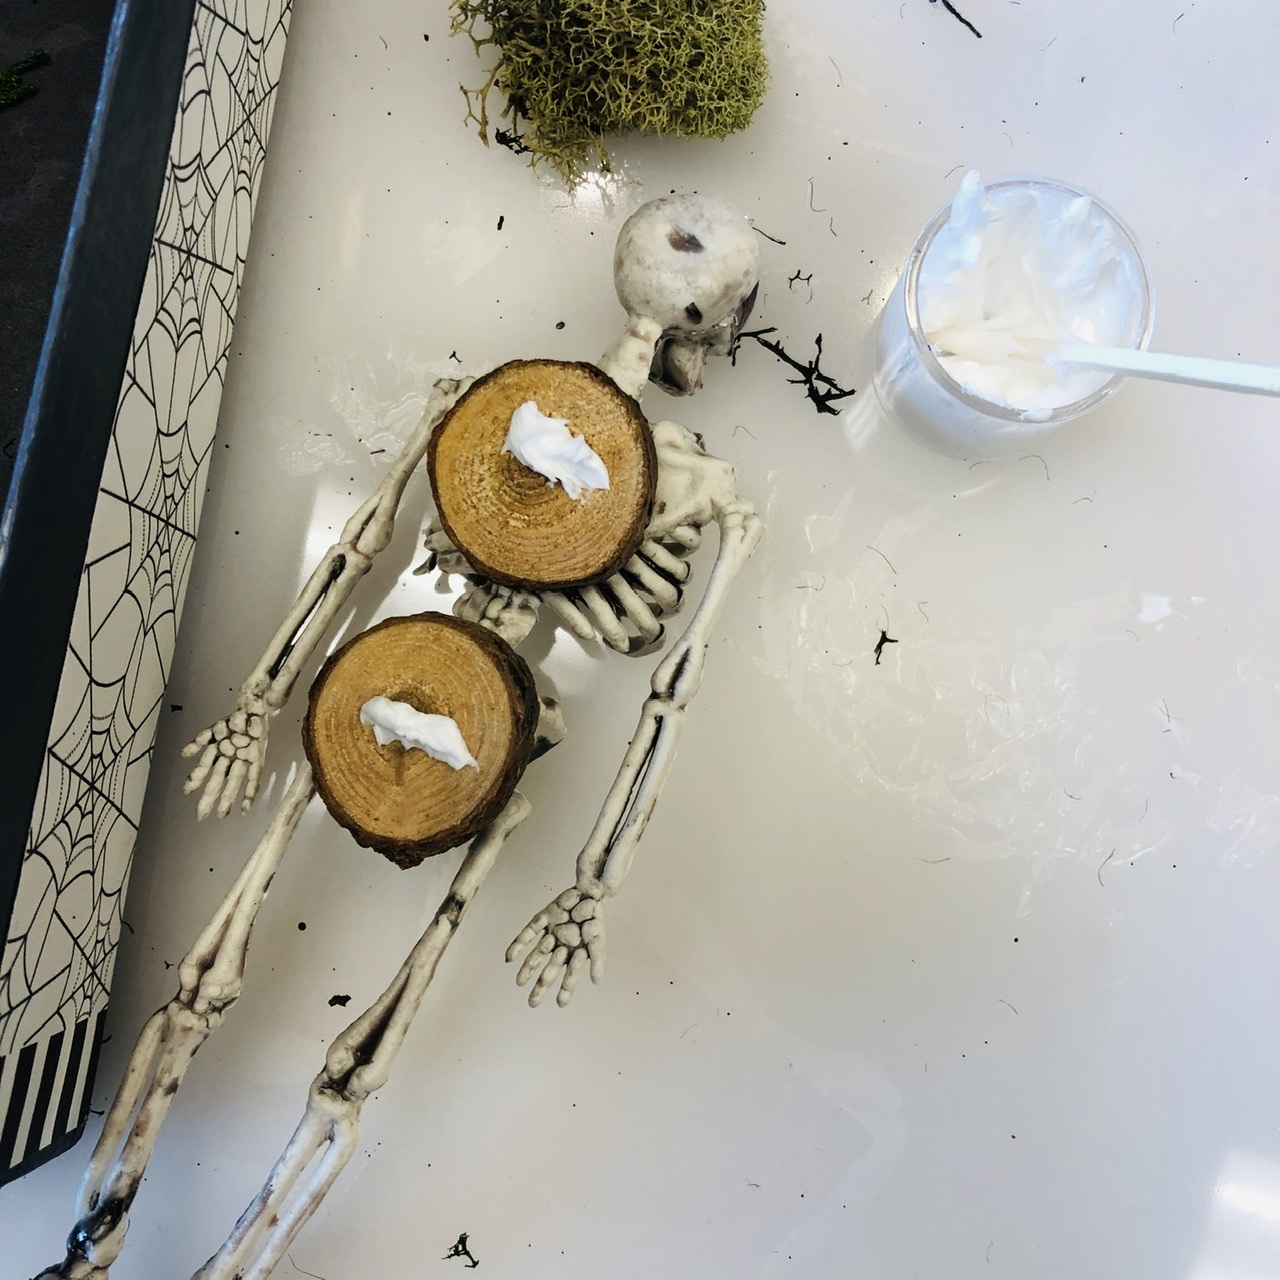
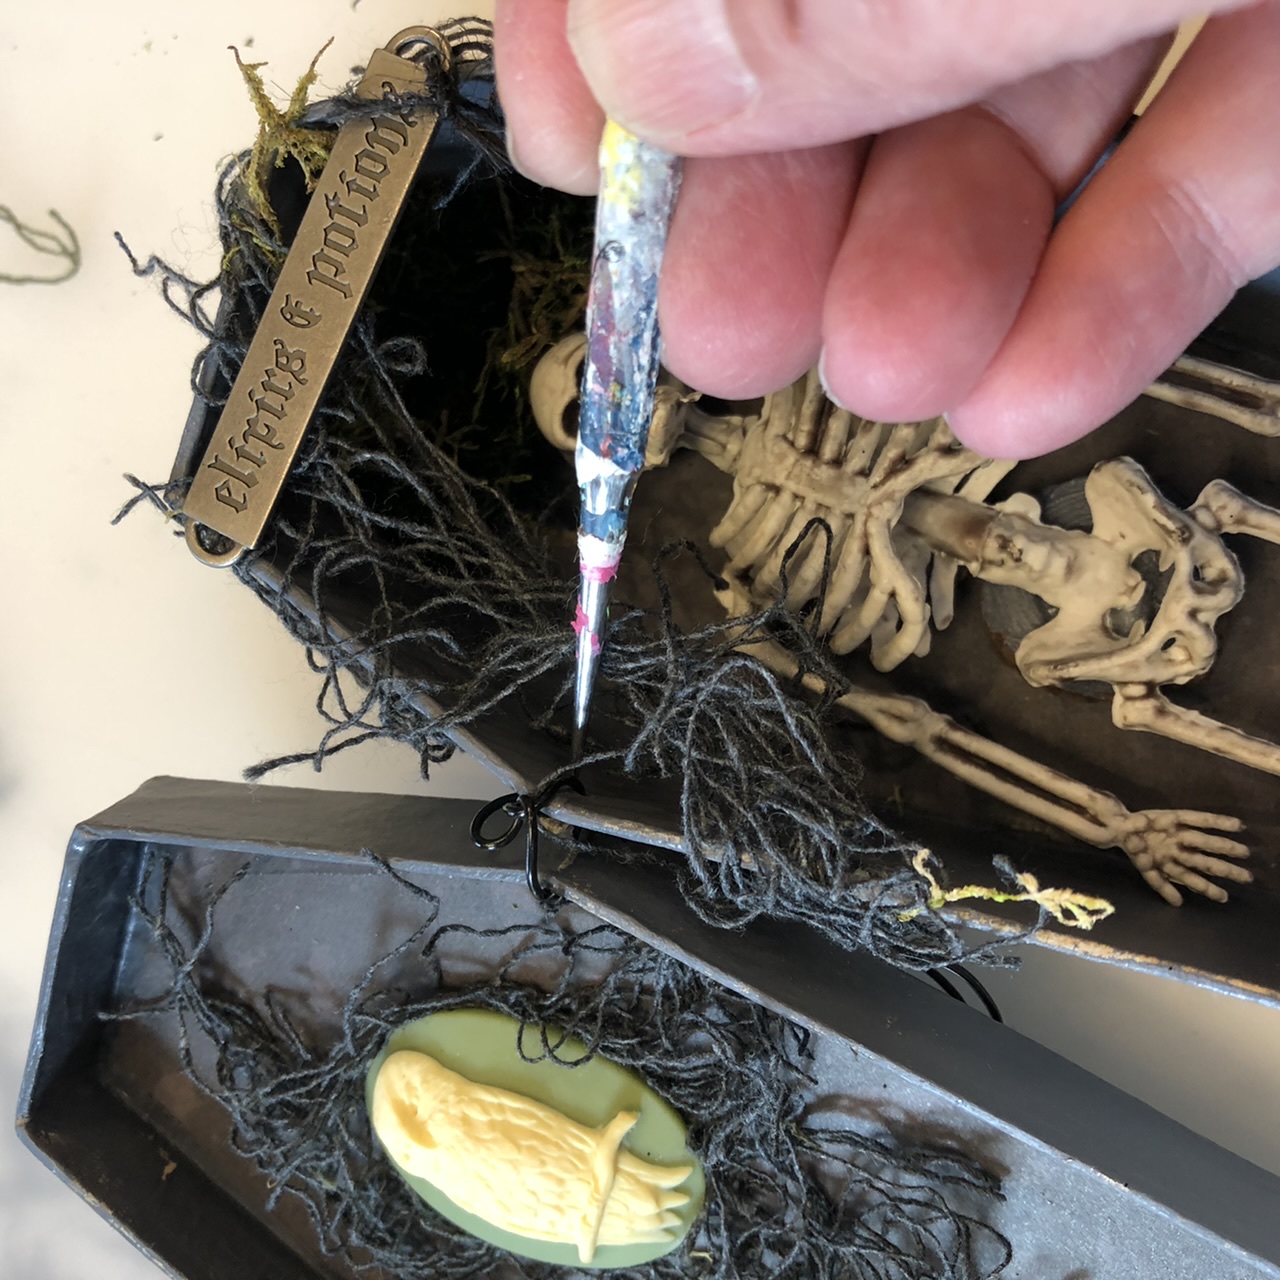
Tip: Take a photo on your phone to use as a reference before you disassemble anything for easy gluing. Now you can glue down all the other fun items! I used the MMP to glue the labels to the bottles, and the ULT to attach everything else—just using a small dollop on the touch points of the items. The glue dries clear, however, if there is a globshowing, remove the excess or cover it with a bit of moss.
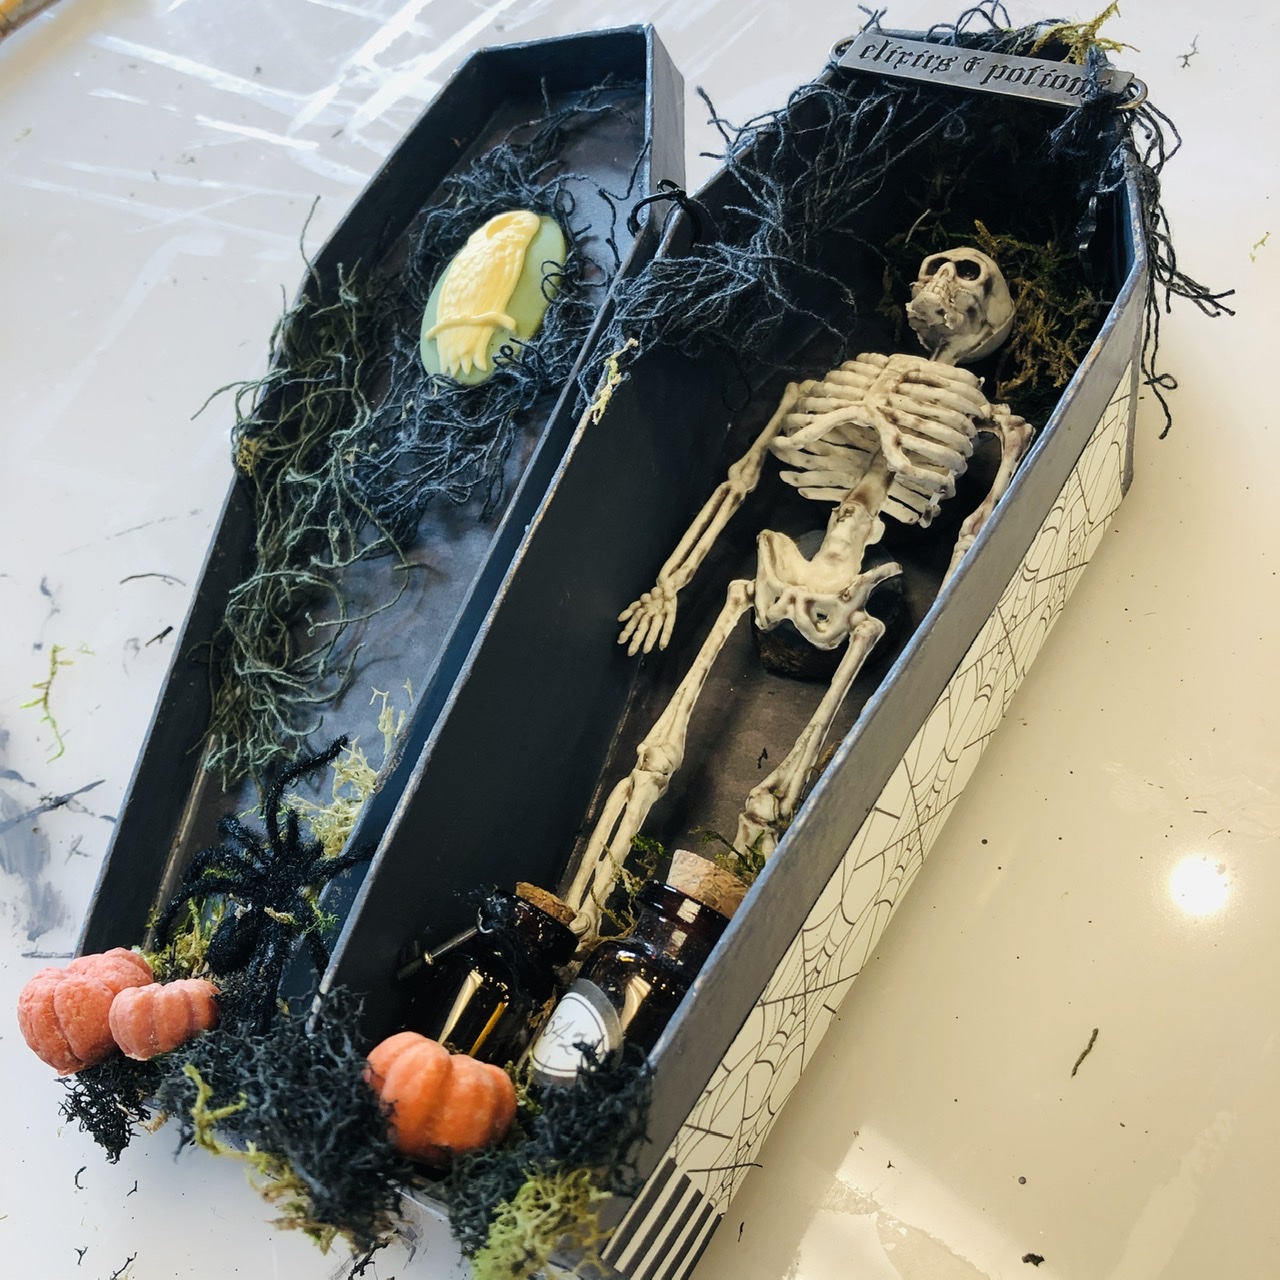
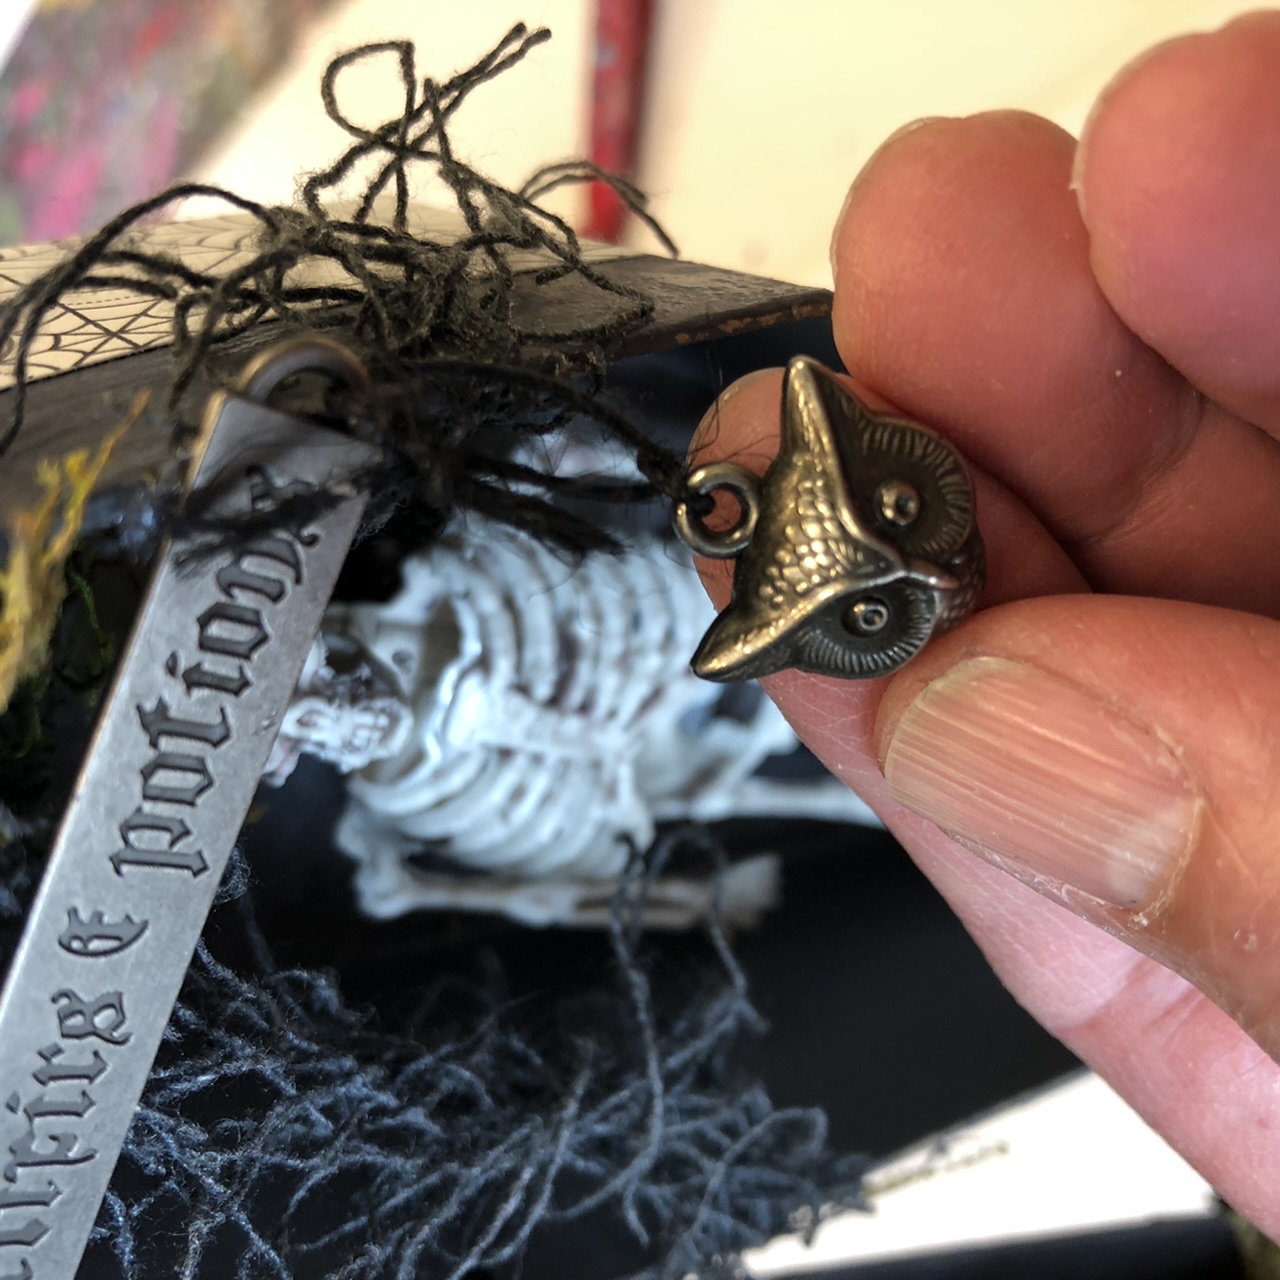
The string is great for attaching the owl charm to the word band. It also can be wrapped around the neck of a bottle to attach the key charm. Fray the ends on the string, leave them long or any other fun idea.
To attach the lid to the base, I poked hole in the base and in the lid, with an awl –If a child is making this project, this would be a step an adult should do! Be sure to gently push the awl from the inside out, carefully bracing the outside edge with your fingers. Connect them with the black wire by twisting the wire. Tuck the extra behind the lid.
This was so fun to make—I hope you enjoy making yours too!!!
Order your kit today! (There are slight variations with each kit.)